Estimated reading time: 4 minutes

How to start streaming? Streaming on platforms like Twitch and YouTube has become incredibly popular, allowing gamers, content creators, and artists to share their passion with a global audience. If you’re eager to start streaming but aren’t sure where to begin, this tutorial will guide you through the process using OBS Studio—a free and powerful software for live streaming.
1. Download and Install OBS Studio
The first step to getting started is downloading OBS Studio.
Visit the OBS Studio website and download the version that matches your operating system (Windows, macOS, or Linux). Follow the installation instructions, and once installed, launch OBS Studio.

2. Set Up OBS Studio
After launching OBS, you’ll need to configure it for streaming.
a. Optimize Settings:
- Go to
Settings > Outputand set your video bitrate. A common bitrate for 720p streaming is 2500 to 4000 kbps, while for 1080p, you can set it to 4000 to 6000 kbps. - In
Video, set your Base (Canvas) Resolution to your monitor’s resolution and Output (Scaled) Resolution to what you want your stream to be. The common choice is 1920×1080 or 1280×720.
b. Audio Configuration:
- Under
Settings > Audio, select your microphone and desktop audio sources. This ensures that both your voice and any game or application audio will be captured.
3. Set Up Your Stream Key
To connect OBS with Twitch or YouTube, you’ll need a stream key.
a. For Twitch:
- Go to your Twitch Dashboard, navigate to
Settings > Stream, and copy your stream key. - In OBS, go to
Settings > Stream, selectTwitchas your service, and paste your stream key.
b. For YouTube:
- Visit your YouTube Live Dashboard, find your stream key under
Stream Settings, and copy it. - In OBS, select
YouTube/YouTube Gamingas your service and paste the stream key.
4. Configure Your Scenes and Sources
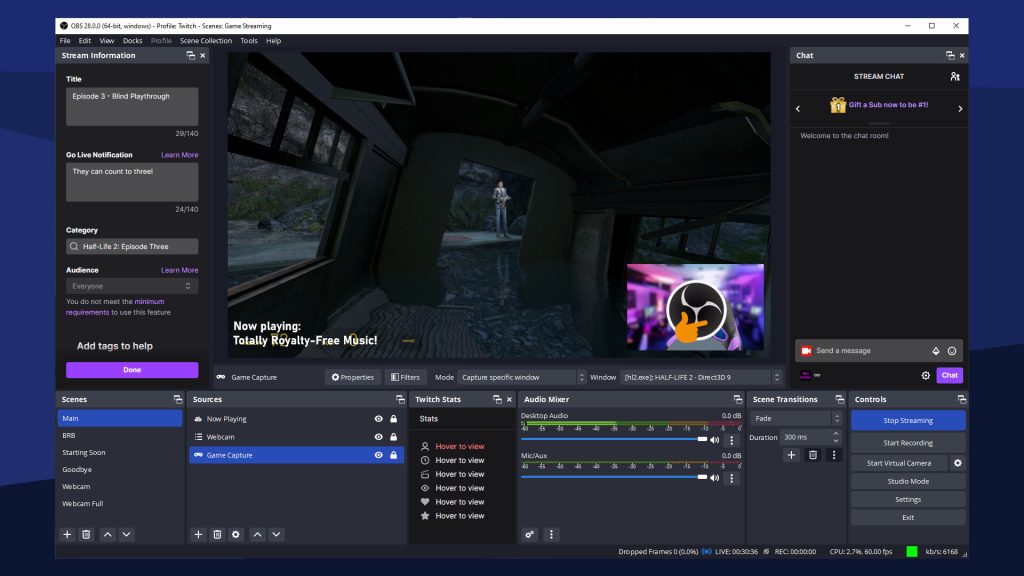
Scenes and sources are the building blocks of your stream in OBS.
a. Create a Scene:
- Click the
+button underScenesto create a new scene. Name it something relevant, like “Gameplay” or “Chatting.”
b. Add Sources:
- Click the
+button underSourcesto add elements to your scene. Common sources include:- Display Capture: Captures your entire screen.
- Game Capture: Captures only the game window.
- Video Capture Device: Adds your webcam feed.
- Audio Input Capture: Captures your microphone.
Organize these sources in the desired order (e.g., webcam above the game capture).
5. Start Your First Stream

With everything set up, it’s time to go live!
a. Test Your Stream:
- It’s wise to do a test stream first. Set your stream to private (on YouTube) or enable a test broadcast mode (on Twitch) to ensure everything looks and sounds good.
b. Go Live:
- Once you’re ready, click
Start Streamingin OBS. You’re now live on your chosen platform!
6. Enhance Your Stream with Overlays and Alerts
To make your stream more engaging, consider adding overlays and alerts.
a. Add Overlays:
- Websites like Streamlabs and Nerd or Die offer free and paid overlay templates that you can customize and add to your OBS scenes.
b. Set Up Alerts:
- Alerts notify you when someone subscribes, donates, or follows your channel. You can set these up through Streamlabs or other alert services by adding them as browser sources in OBS.
7. Monitor and Engage with Your Audience
A crucial part of streaming is interacting with your viewers.
a. Use Chat Tools:
- Keep an eye on chat using tools like Twitch’s built-in chat, or third-party apps like Streamlabs Chatbot, to engage with your audience in real-time.
b. Monitor Stream Health:
- Use OBS and your streaming platform’s dashboard to monitor the health of your stream. Watch for any performance issues and adjust settings as needed.
Conclusion
Starting your streaming journey with OBS Studio on Twitch or YouTube is a rewarding experience. By following this tutorial, you’ll be equipped to share your content with the world in a professional and engaging way. Remember, streaming is about having fun and connecting with your audience—so enjoy the process and happy streaming!
Note that you can also add your stream to Musiveo so other users can watch your stream live from this platform as well. Please visit the Twitch, Youtube & Kick page and fill out the forms.


Comment